게시물 작성하기
이제 안드로이드 프로젝트에 게시물 작성 하기 액티비티와 연동해보도록 하겠습니다.
build.gradle (Module: Project) 에 아래와 같이 dependencies에 classpath를 추가 합니다.
classpath 'com.amazonaws:aws-android-sdk-appsync-gradle-plugin:2.9.+'
build.gradle (Module: app) 에 plugin을 적용시킵니다. build.gradle (Module: app) 상단에 아래와 같이 복사해서 붙여 넣습니다. 이 plugin에 의해 코드가 자동생성됩니다.
apply plugin: 'com.amazonaws.appsync'
참고로 apply plugin: ‘com.amazonaws.appsync’를 추가할 때 싱크 문제 때문에 com.amazonaws.appsync not found 문제가 뜰 수 있습니다. classpath ‘com.amazonaws:aws-android-sdk-appsync-gradle-plugin:2.9.+‘를 추가 후에 싱크를 한번 해 주고 나서 apply plugin 을 해주면 정상적으로 수행 됩니다.
또한 같은 파일에 -build.gradle (Module: app)- 에 아래와 같이 dependencies에 4개의 implementation을 추가 합니다.
dependencies {
...
implementation 'com.amazonaws:aws-android-sdk-appsync:2.9.+'
implementation 'org.eclipse.paho:org.eclipse.paho.client.mqttv3:1.2.0'
implementation 'org.eclipse.paho:org.eclipse.paho.android.service:1.1.1'
implementation 'com.amazonaws:aws-android-sdk-s3:2.14.+'
...
}
다음으로 자주 사용되는 AWSAppSyncClient 를 재사용하기 위해 ClientFactory class를 아래와 같이 생성합니다.
ClientFactory.java
package com.example.socialandroidapp;

import android.content.Context;
import android.util.Log;

import com.amazonaws.auth.AWSCredentials;
import com.amazonaws.auth.AWSCredentialsProvider;
import com.amazonaws.auth.CognitoCachingCredentialsProvider;
import com.amazonaws.mobile.client.AWSMobileClient;
import com.amazonaws.mobile.config.AWSConfiguration;
import com.amazonaws.mobileconnectors.appsync.AWSAppSyncClient;
import com.amazonaws.mobileconnectors.appsync.S3ObjectManagerImplementation;
import com.amazonaws.mobileconnectors.appsync.sigv4.CognitoUserPoolsAuthProvider;
import com.amazonaws.regions.Region;
import com.amazonaws.services.s3.AmazonS3Client;

public class ClientFactory {

    private static AWSAppSyncClient mAWSAppSyncClient;

    public static void appSyncInit(Context context) {
        if (mAWSAppSyncClient == null) {
            mAWSAppSyncClient = AWSAppSyncClient.builder()
                    .context(context)
                    .awsConfiguration(new AWSConfiguration(context))
                    .cognitoUserPoolsAuthProvider(new CognitoUserPoolsAuthProvider() {
                        @Override
                        public String getLatestAuthToken() {
                            try {

                                return AWSMobileClient.getInstance().getTokens().getIdToken().getTokenString();
                            } catch (Exception e) {
                                Log.e("APPSYNC_ERROR", e.getLocalizedMessage());
                                return e.getLocalizedMessage();
                            }
                        }
                    }).s3ObjectManager(getS3ObjectManager(context)).build();

        }
    }

    public static AWSAppSyncClient getAppSyncClient() {
        return mAWSAppSyncClient;
    }

    private static S3ObjectManagerImplementation s3ObjectManager;

    // Copy the below two methods and add the .s3ObjectManager builder parameter
    // initialize and fetch the S3 Client
    public static S3ObjectManagerImplementation getS3ObjectManager(final Context context) {
        if (s3ObjectManager == null) {


            AmazonS3Client s3Client = new AmazonS3Client(ClientFactory.getCredentialsProvider(context));
            s3Client.setRegion(Region.getRegion("us-east-1")); // you can set the region of bucket here
            s3ObjectManager = new S3ObjectManagerImplementation(s3Client);
        }
        return s3ObjectManager;
    }

    // initialize and fetch cognito credentials provider for S3 Object Manager
    public static AWSCredentialsProvider getCredentialsProvider(final Context context) {
        CognitoCachingCredentialsProvider credentialsProvider = new CognitoCachingCredentialsProvider(
                context, AWSMobileClient.getInstance().getConfiguration()
        );
        return credentialsProvider;
    }

    public static String getUserID() {
        return AWSMobileClient.getInstance().getUsername();
    }

    public static AWSCredentials getAWSCredentials()  {
        AWSCredentials awsCredentials = null;
        try {
            awsCredentials = AWSMobileClient.getInstance().getAWSCredentials();
        } catch (Exception e) {
            e.printStackTrace();
        }
        return awsCredentials;
    }
}
WriteActivity.java 의 onCreate 함수에서 위에서 생성한 ClientFactory 이용하여 AWSAppSyncClient를 생성합니다.
onCreate()함수에 아래와 같이 ClientFactory.appSyncInit(..) 를 추가하세요.
  @Override
    protected void onCreate(Bundle savedInstanceState) {
        super.onCreate(savedInstanceState);
        setContentView(R.layout.write);
        //appsync
        ClientFactory.appSyncInit(getApplicationContext());
        ...
  }
WriteActivity.java에서 DONE 버튼으로 게시물을 업로드 할경우 저장소에 게시물이 저장될 수 있도록 addComment 함수를 추가합니다. 아래 소스를 복사해서 넣으신 후 putYourBucketName 변수값을 여러분의 S3 버킷 이름으로 교체 하세요
     //appsync upload
 private final String putYourBucketName = "putYourBucketName";
 private final String mimeType = "image/jpg";
 private final String region = "us-east-1";
 private final String folderName = "public/";

 private void addComment() {

        showWaitDialog();

        S3ObjectInput s3ObjectInput = S3ObjectInput.builder()
                .bucket(putYourBucketName)
                .key(folderName + UUID.randomUUID().toString())
                .region(region)
                .localUri(bitmapPath)
                .mimeType(mimeType).build();
        PutPostWithPhotoMutation addPostMutation = PutPostWithPhotoMutation.builder()
                .title(title.getText().toString())
                .author(ClientFactory.getUserID())
                .url(bitmapPath)
                .content(contents.getText().toString())
                .uptime(String.valueOf(System.currentTimeMillis()))
                .photo(s3ObjectInput)
                .id("DEV-DAY")
                .build();


        ClientFactory.getAppSyncClient().mutate(addPostMutation).enqueue(postsCallback);
    }

    private GraphQLCall.Callback<PutPostWithPhotoMutation.Data> postsCallback = new GraphQLCall.Callback<PutPostWithPhotoMutation.Data>() {
        @Override
        public void onResponse(@Nonnull final Response<PutPostWithPhotoMutation.Data> response) {
            runOnUiThread(new Runnable() {
                @Override
                public void run() {
                    dismissWaitDialog();
                    WriteActivity.this.finish();
                }
            });
        }

        @Override
        public void onFailure(@Nonnull final ApolloException e) {
            runOnUiThread(new Runnable() {
                @Override
                public void run() {
                    dismissWaitDialog();

                    Log.e("", "Failed to perform AddPostMutation", e);
                    WriteActivity.this.finish();
                }
            });
        }
    };
필요한 class를 import 합니다.
import com.amazonaws.amplify.generated.graphql.PutPostWithPhotoMutation;
import com.apollographql.apollo.GraphQLCall;
import com.apollographql.apollo.api.Response;
import com.apollographql.apollo.exception.ApolloException;
import type.S3ObjectInput;
import javax.annotation.Nonnull;
import android.util.Log;
이 함수는 onCreate함수의 saveBtn에 onClick event시 호출될 수 있도록 합니다.
기존의 코드인 WriteActivity.this.finish() 는 지우시고, 그자리에 addComment()를 넣으세요.
  @Override
    protected void onCreate(Bundle savedInstanceState) {
        super.onCreate(savedInstanceState);
        setContentView(R.layout.write);
        //appsync
        ClientFactory.appSyncInit(getApplicationContext());
        ...
        saveBtn.setOnClickListener(new View.OnClickListener() {
            @Override
            public void onClick(View v) {
                if (bitmapPath == null) {
                    Toast.makeText(getApplicationContext(), getString(R.string.warning_picture), Toast.LENGTH_SHORT).show();
                    return;
                }

                //WriteActivity.this.finish();
                addComment();

            }
        });
        ...
  }
안드로이드 스튜디오 프로젝트 상단에 실행버튼 을 눌러 이미 생성하신 에뮬레이터로 어플리케이션을 실행합니다.

실행된 화면은 다음과 같습니다.

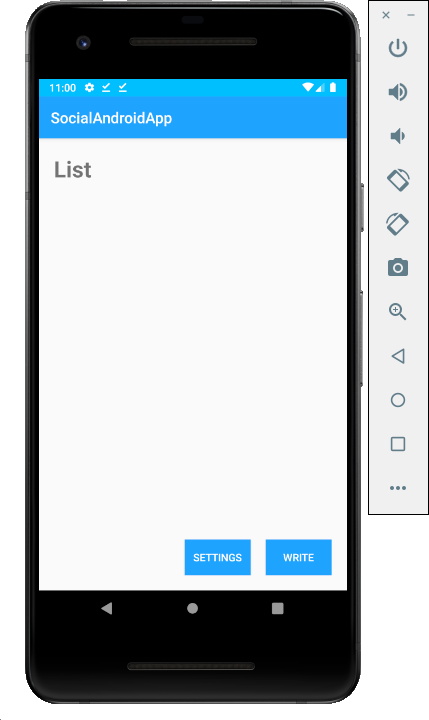
로긴을 하시고, 만약 로긴이 된 상태라면 아래 처럼 빈 리스트화면이 나타납니다.

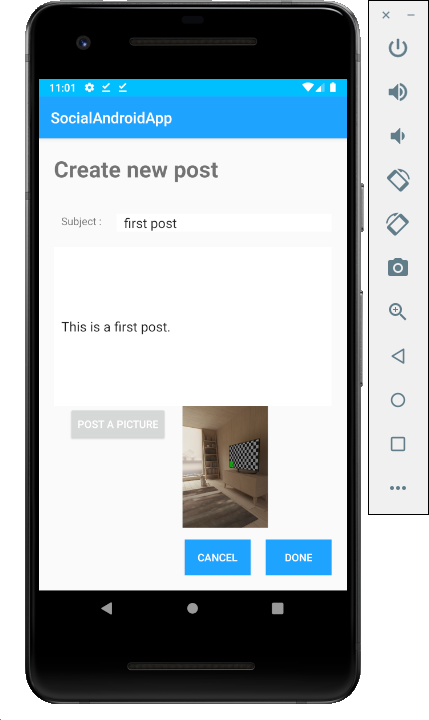
글쓰기 버튼을 눌러 게시작성 화면으로 이동하신후 아래처럼 작성 및 사진을 업로드하고, done 버튼을 누르세요.
이때 에뮬레이터를 처음 설치하셨다면 선택할수있는 사진이 없습니다. 카메라 어플로 이동하신 후 더미 사진을 한잔 찍고 나면 사진을 선택하실 수 있습니다.
잠시후 빈 리스트화면으로 이동됩니다.
